We moved to Singapore! That is, husband, two kids, one dog and me.
Actually, its been about a year and a half since the incredibly intense experience of packing up our house, selling our furniture, putting stuff in storage, and flying with two children under the age of 4 halfway across the world. Did I mention, we moved the dog?
He had to be examined, tested, certified by the USDA to be ready to move. He survived the over 20 hour flight only to be quarantined upon arrival for a month!
My husband started his new job, I found one for myself, our kids started at their new school. All of which to say, I have not had the mental wits to resume writing this blog. If not for the lovely ladies who keep writing me about how to get the little red yarn eggs, I might have put this off even longer.
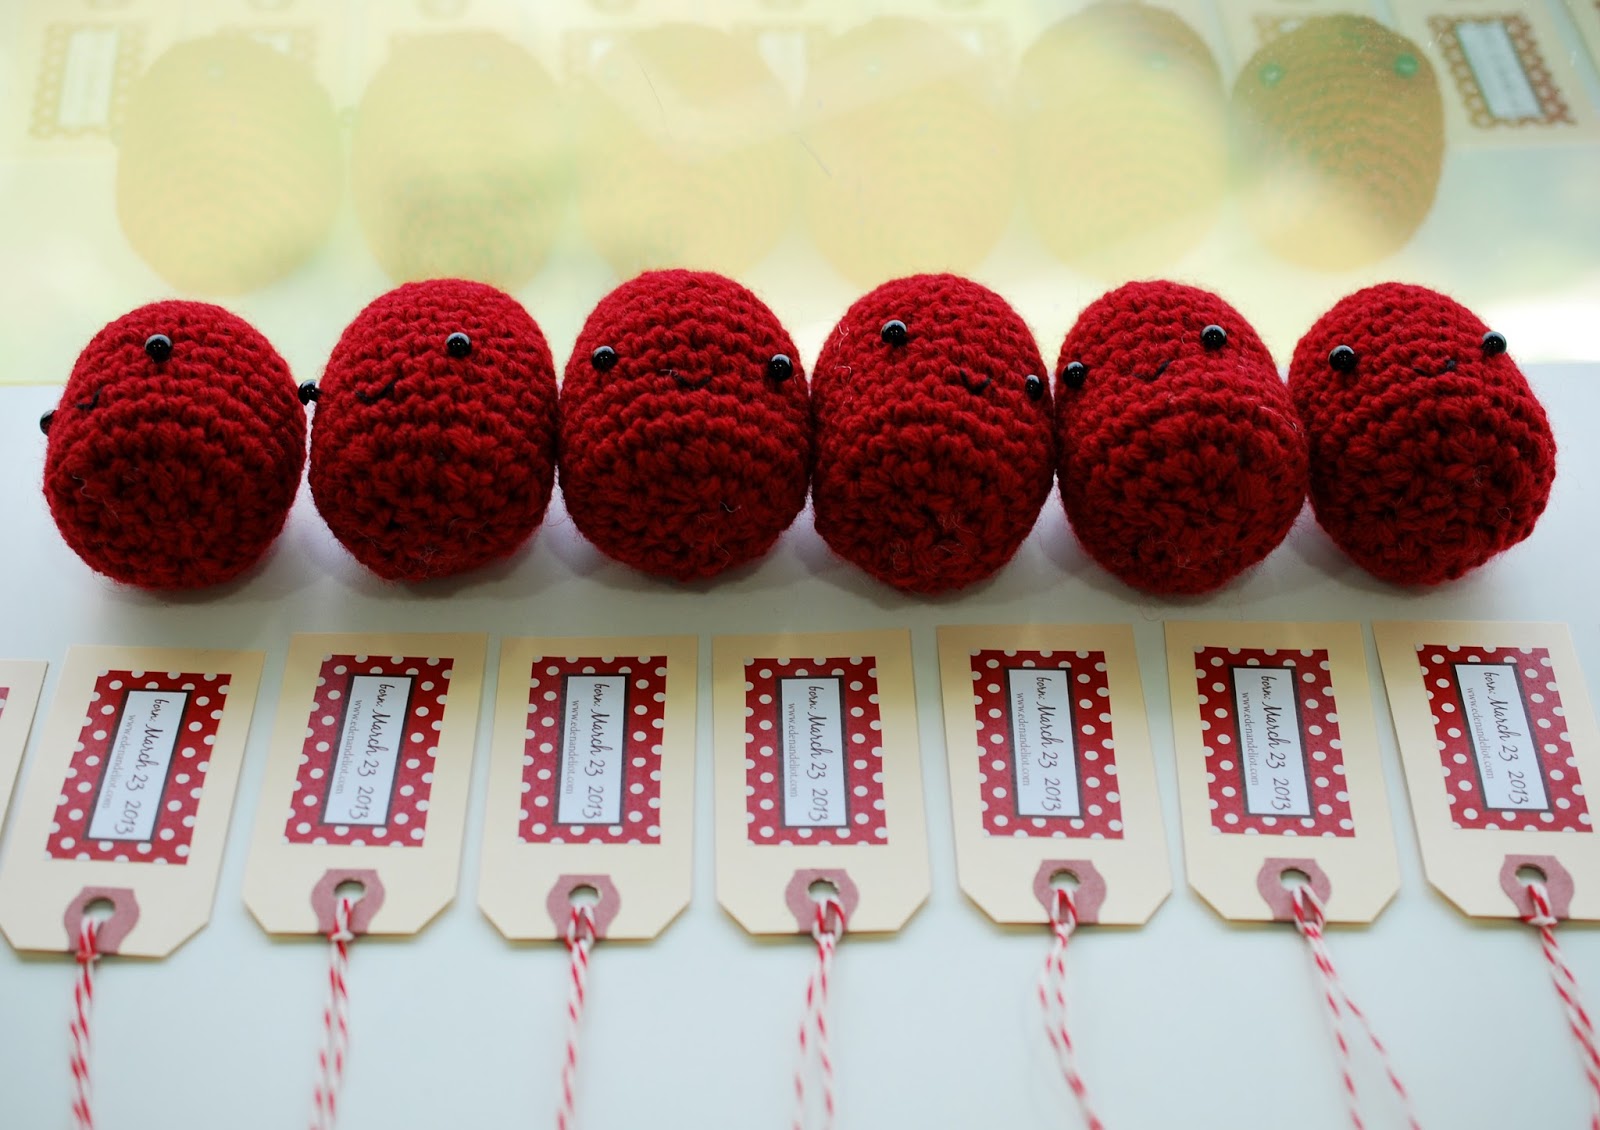
One lovely lady in particular was sweet to write me about her daughter, Emma, who is going to be celebrating her Red Egg & Ginger Party next week. I wanted to help her so I found the box that contained my yarn supplies, dusted off my patterns and made half a dozen of them. (Yes, I moved ALL my craft supplies, except the sewing machine.)
Pretty Little Labels for Red Eggs
Emma's mommy will receive this little tags in an array of pretty patterns. The back of them has her special date of arrival!
Red Eggs and Gift Tags
Can't wait for her to open up her package!
Want to order eggs for party or crochet your own? Write me or visit my etsy shop.
I picked up my crochet hook again recently after a spell of almost a year. After my son, Eliot, was born last April, I took to learning how to crochet because of many a late night spent nursing him. The doctor had us put him on a frequent feeding schedule because of reflux, so I figured it would be less painful for me to stay awake between feeds rather than sleep for 45 minutes at a stretch.
I made a bushel full of amirugumi toys and soon developed my own patterns. When he turned a month old, I made the first Happy Little Red Egg.
Yesterday, Eliot turned one year old! Happy, happy, birthday to my dear boy.
So here are a few other companions to the first Little Red Egg to join in the celebration. I made Happy Little Pirate Egg, Chef Egg, and Cowboy Egg - all wonderful characters with alot of personality.
With Easter is just round the corner, I thought it would be fun to have plenty of yarn eggs to hunt down instead of the usual candy variety. They are easy to make and I put the patterns in my little etsy shop. My sweet husband suggested I make enough eggs to fill a bed so our kids can jump into a a giant nest full of eggs. Awesome idea but last I checked, he doesn't crochet, so nope I don't think its going to happen any time soon.
But I think if I knit a few every year, my children will have a basketful of characters by the time they're all grown up. I can tag them by the year so they can look back and see when each little egg was made. Now that, I can do. Happy, happy!
My good friend, Mel, threw a birthday party for her sweet little girl a few weekends ago, which gave me the occasion to make these letter pillows that I'd dreamed up a while back but hadn't gotten round to doing.
The birthday girl has the initial C, but her older brother's name begins with M. So, I thought why not bring them both pillows since in my house, good things always come in twos.
The pillows have envelope backs (see my post on how to make an envelope closure), and fusible-web applique letters. You can put a whole set together for a nursery, use them to spell a word or just do special letters or dates. Lots of possibilities here - so I daresay I'll be making more of these soon.
But on the subject of birthday parties - check out this party favor that Mel put together.
She saved these baby food jars for months and turned them into favors by adding nifty personalized labels. I totally loved how she found such good use out of an ordinary thing but more so that she was planning and thinking of celebrating her daughter's big day, every day that she would put one of these away. What better way is there to repurpose what you've got than by sharing your efforts with loved ones.
Sign up for our February Giveaway to win a lovely hand-stamped dish towel with this same leaf pattern here.
Bringing your own bag to the grocery store is all the rage now so its no wonder that every store seems to have its own store-branded recycled "I-used-to-be-a-plastic-bottle" carrier.
For one thing, they are usually not the most attractive bags - the graphics can be screamy and even worse, the news media reported last December that lead was found in some of the bright inks that were used to logo these totes.
I love to bring my own bags, so I thought I would try to make some that would be fun to carry around. Here's what you need:
Materials
Blank cotton bag (I found muslin bags at my neighborhood dollar store)
Rubber stamps of your choice (bold graphics without alot of fine lines will work best)
Instructions
1. Prewash the bag in cold water, and dry without using fabric softeners. You need to wash the sizing out of the fabric or the ink will not print well. Press and smooth flat.
2. Figure out how many stamped impressions you can make on the fabric, mark the center of your design and start there. For the bag shown above, I made two rows of 7 impressions, so I marked the middle and stamped to the left and right. If you are meticulous about spacing, you can mark each spot and stamp from one end to the other, but I find it easier to eyeball it from the middle.
3. Prepare your ink. If you are using screenprinting ink, scoop out what you need with a clean spoon and spread it on your plate or cookie sheet. You'll get better results if you mix at least two colors together and don't use it straight out of the jar. Its an old habit of mine from my painting days, and I know from experience that the color comes out much richer this way. Use a clean spoon for each color.
4. Mix the colors directly on your plate and use your brayer to smooth out a even coat. Apply the ink onto your stamp using the brayer. You should transfer an even coat onto the stamp. Always test on a scrap piece of fabric! Once you have gotten the hang of transferring the right amount of ink onto the stamp, press firmly onto the fabric with even pressure. Do not wiggle. Lift quickly. Repeat.
5. Clean the stamp well before changing colors. For the bag above, I did the top row with Peacock Blue mixed with White, and bottom with Brown and a little Black.
6. When the prints are dry to the touch, put a piece press cloth over it and set a hot, dry iron on it for about 20-30 seconds.* This will heat set the ink and render it washable. Make sure you cover every part of your design.
*Actual heat-setting time will depend on how hot your iron is. You can do it a little longer to be safe, as long as you use a press cloth to protect your fabric.
**If you are using the fabric stamp pads, you can skip all the mixing and brayer action but you will still need to heat set it.
Hand-printed muslin tote by Eden and Eliot
Finally, a close up of my totes. I made a run of 6 bags and was going to put them in my Etsy store but ended up giving most of them to friends. Make a personal label for it, and fill it up with goodies for a hostess gift. Or stamp a bunch of them for birthday party favors. They will also make a fun afternoon activity with older kids.
If you do end up making these, I'd love to hear from you. Have fun!
I am convinced that you can never have enough magnets for your refrigerator door. Especially if you belong to the demographic set of thirty-something year olds who are new parents of babies/toddlers that I do. My friends send me the latest and cutest pics of their little ones, and I keep them up long after the original occasion is over.
Seeing these photos helps remind me that I am not the only one going through this rough and tumble phase of raising young kids, barely holding on to the edge of sanity. And of course, the Poison Control phone number is a handy one to keep up there as well.
Hence, my solution is to acquire more magnets - not just the office supplies store variety, mind you. If you are going to have to look at it many times a day (think how many times you open and close your fridge door), it'd better be something worth looking at. I'm tired of staring at that grimy bit of post-it note, stained with sauce, held up by a chipped plastic disc.
Here is my first attempt in making my own special magnets. Looking at them makes me feel just a little bit happier throughout the day - especially since they spell out the reasons why I should still get myself out of bed in the morning and live each day the best I can.
My baby boy turned one month old in May, and as customary for the Chinese side of the family, we made hard-boiled eggs and dyed them red to celebrate. Well, except that my husband doesn't eat eggs and my two year old doesn't eat much, so we couldn't get away with making too many.
So I came up with the idea of making little yarn eggs that make great giveaways and don't need refrigeration. Put a pair of them in these little wood boxes, dress them up with personalized tags with your baby's initials and date of birth, and they are ready for your party!
I used shipping labels from the office supplies store and created tags with a set of vintage stamps I found at a garage sale. Brown ink makes for a beautifully aged, and "not too precious" look.
This wood boxes were found in the unfinished wood crafts section of Michael's. Stuff the boxes with some straw and they make a great home for your little eggs.
Glue a ribbon band around the box, and finish off with your favorite knot. I stamped these light-blue Martha Stewart tags to label the boxes, but you can use stickers or any other tags you like.
Halve 7 eggs lengthwise. Remove yolks and place in a small bowl. Mash yolks with a fork and stir in mayonnaise, pickle relish, and mustard. Add salt and pepper, to taste. Fill egg whites evenly with yolk mixture. Garnish with paprika, pickles and pimentos. Store covered in refrigerator.



 , or
, or stamp pads
 and plate or
  (if using screenprinting ink)


